Customer
On this page
Customers can only be managed with the Manage customers permission.
In order for the sensors and rules to be used, they must be linked to a customer. At least one customer must be created for this. The visual representation of presence is only possible if the sensor has been assigned to a customer.
Add customer
1. Open the dashboard in the top navigation bar.

2. Now click on the icon that appears on the right-hand side to open the customer menu.
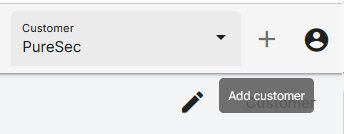
3. Click on the + symbol to create a new customer.
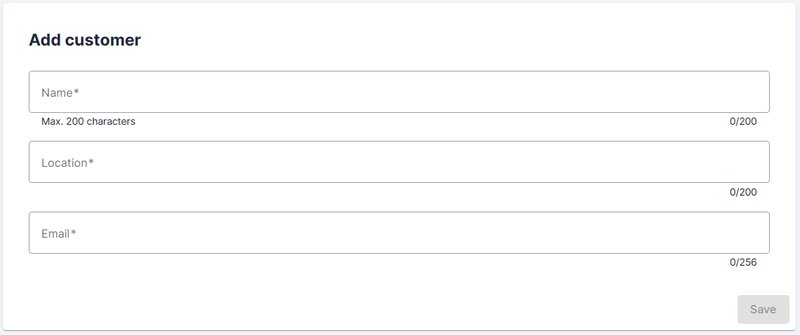
4. Fill out the form that appears and then click on Save.
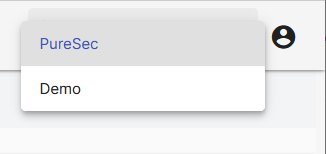
5. The customer can then be selected from the list and switched to its context.
Add rule
Rules can only be managed with the Manage rules permission.
A rule for customers is stored globally and applies to each customer sensor. This simplifies the administration of the rules, as they do not have to be created individually for each sensor and a uniform set of rules is applied for the entire customer.
1. Open the dashboard in the top navigation bar.

2. Now click on the name of the customer you are in in the left navigation bar.
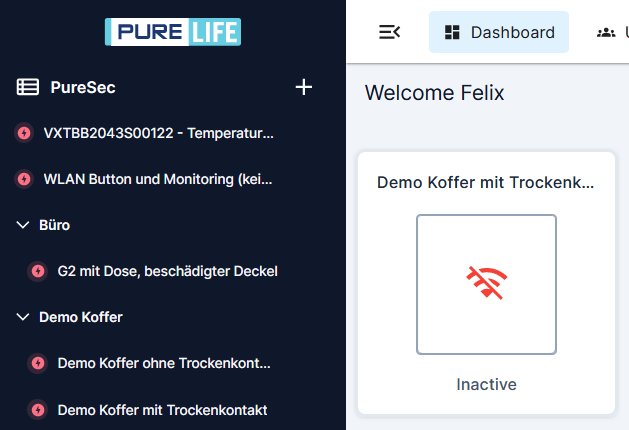
3. Select rules to manage this.

4. Follow the Guide to Creating Rules.
The customer rule is then active and is used when a corresponding situation occurs.
Add Webhooks
This section is about creating webhooks in the PureLife Cloud. If you are a developer who wants to receive webhooks, see the integration docs.
The PureLife Cloud supports webhooks for easy integration of external applications. Webhooks can be created for bots or customers. A webhook for customers is stored globally and applies to every event from every sensor of the customer. A pre-filtering and analysis does not take place. Fixes and advanced features provided by the cloud are thus not available. A customer webhook should only be created after careful consideration.
1. Open the dashboard in the top navigation bar.

2. Now click on the name of the customer you are in in the left navigation bar.

3. Select Webhooks to manage them.
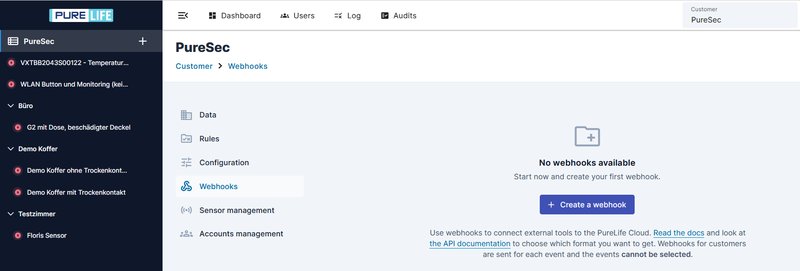
4. Create a new webhook or edit an existing webhook.
5. Fill out the form.
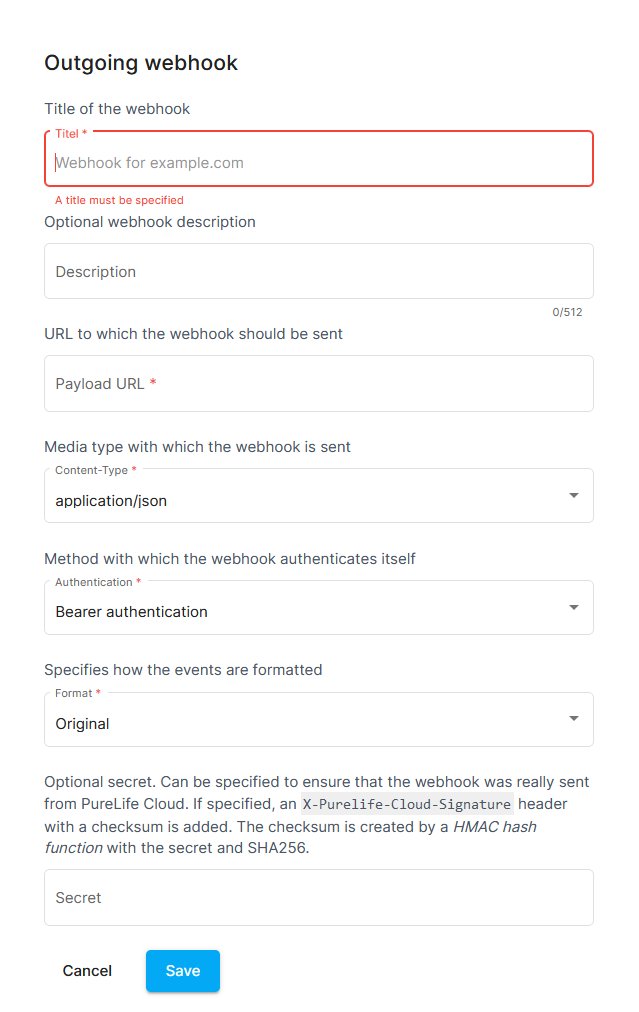
- In the field
Payload-URLenter the url to which the http request should be send to. - Choose one of the
Content-Typ, to define the format of the request body of the event. Available are:application/jsonapplication/xmlapplication/x-yamlapplication/tomlapplication/x-www-form-urlencoded
- Select the authentication in the field
Authentisierung. Available are:Bearer-AuthentisierungX-Api-Key (IETF RFC)X-API-KEY (Case Sensitive)HTTP/Basic
- Choose one of the
Formatto define the layout the events are send. Available are:PureSecCustom 1Sensor raw data
- Enter a
Secretto prove the authenticity of this webhook.
6. Click on Save to save the settings.
The webhook is then immediately active and forwards all events from the sensors according to the settings.
7. Access the Webhook Log
To view the webhook's delivery log, click on the webhook name in the overview. Further details can be accessed by clicking on the POST entry in the following overview.
Add MQTT hook
An MQTT hook offers the possibility for each customer sensor to also send part of its events to another MQTT broker. This means that the events can be processed and evaluated in another system.
The sensor establishes two simultaneous connections, one between the sensor and the PureLife Cloud and another between the sensor and the specified MQTT broker. The sensors send status, case, and presence events to the specified MQTT broker.
1. Open the dashboard in the top navigation bar.

2. Now click on the name of the customer you are in in the left navigation bar.

3. Select Configuration and then MQTT Hook to manage it.
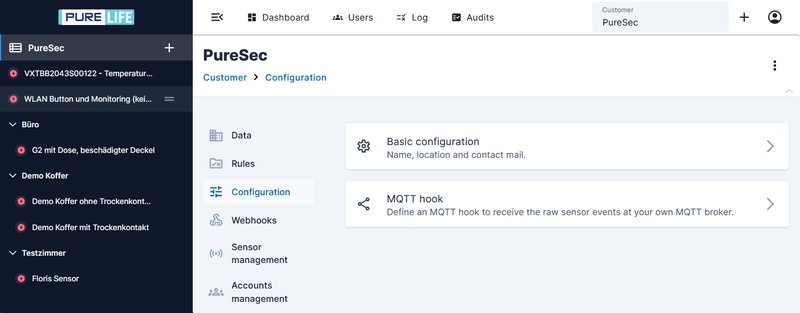
4. Fill out the form.
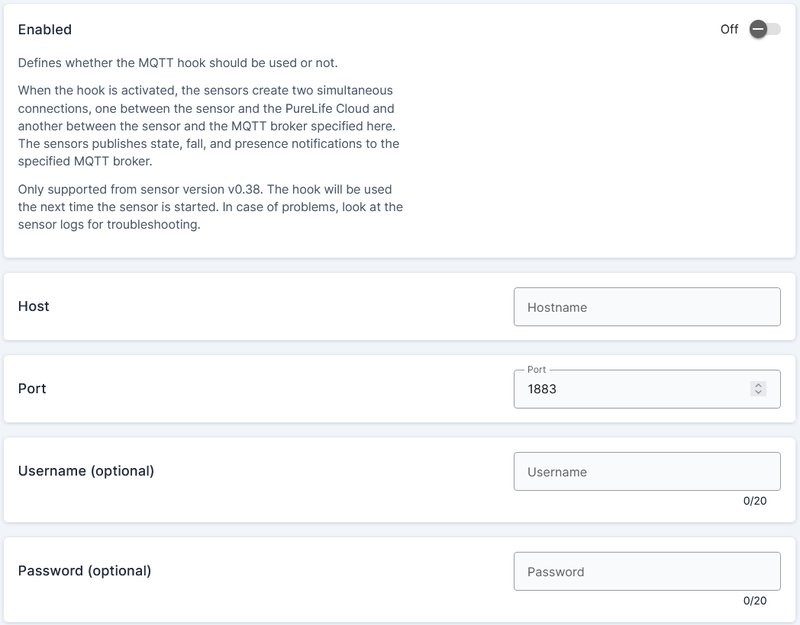
- Under
Host, enter the URL to which the further MQTT connection should be established. - Under
Port, enter the port under which the MQTT broker can be reached. - The
Usernameis optional if the sensor needs to be logged in to the MQTT broker. - The
Passwordis optional if the sensor needs to be logged in to the MQTT broker. The sensor supports a maximum password length of 20 characters.
5.Click on save.
The MQTT hook is then active and will be used the next time the sensor is started.